Ringflash bracket
Commercial ringflash bracket all look alike. And they all suck. That's why I built my own.
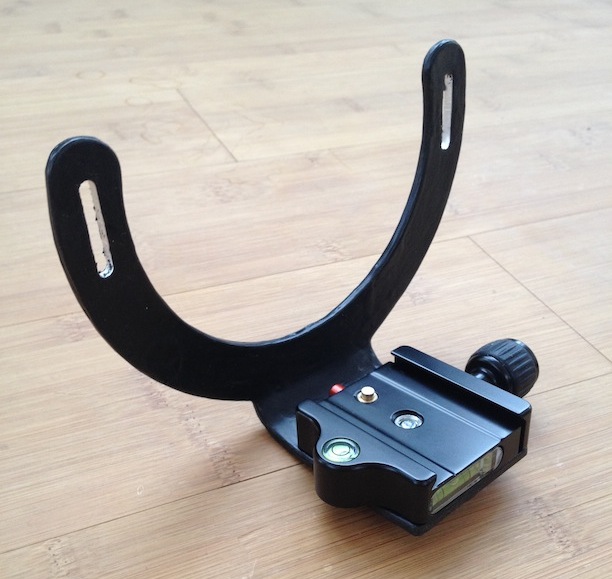
Small, light, no frills, quick release.
The fundamental problem with most ringflash brackets is that they must fit a huge variety of cameras and lenses. All of which have different dimensions.

It must be possible to adjust the vertical position (depending on the distance from the camera base plate to the height of the optical axis). But it must also be possible to move the ring flash on the depth axis (i.e. closer to the camera or further away). Some people use short lenses, others use longer ones, many people need to reach a zoom ring on the lens, which is not possible when the ring flash sits just there. That's why these brackets are adjustable within a wide range. But this creates other problems: if the bracket is long enough to sit on the rim of a 70-200mm lens, then that means the bracket will stick in your face when you use a small 50mm lens. I find that extremely inconvenient.
Saving space and weight
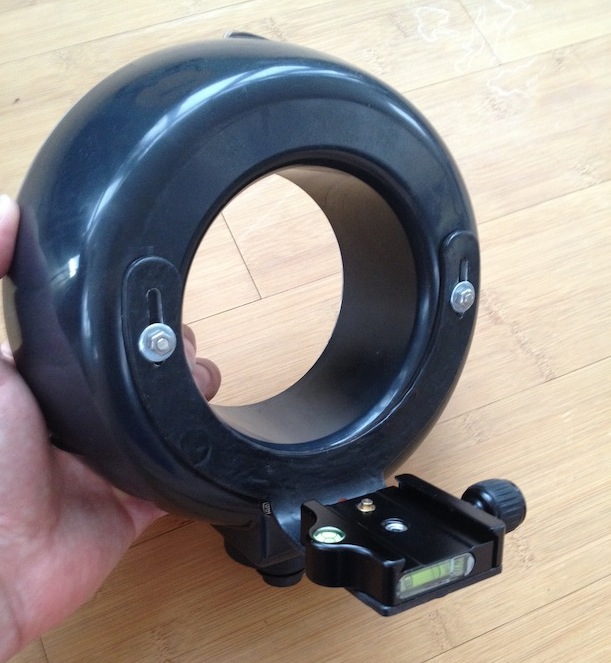
I found that I don't need much adjustment on the depth axis, so I went for a design with a fixed depth position and only vertical adjustment. That makes the whole bracket must simpler. It's basically just a solid piece with no moving parts.
Another problem I found extremely annoying with conventional brackets is that they consist of two L-brackets connected through a bridge part under the camera. That bridge part takes a lot of space on either side, although it just serves the purpose to hold one screw in the middle. Why not go for a more space-saving design? (I'll tell you why: because even the distance between the L's is adjustable, to fit different ringflash models. That's why these brackets all look the same - it's a one-fits-all design. Good for the manufacturers, but meaningless for you if you just own one model. That would be like buying one-size-fits-all-clothes for the reason that anyone can wear them)
I shoot on location a lot, and I don't feel like disassembling and re-assembling half of my equipment all the time just because it takes a ridiculous amount of space in the bag if you leave it mounted. My own design does not overlap towards any side.
How to make one
First I measured all the relevant distances of my camera, my lenses and my ringflash. Then I drew the part in a CAD program and I CNC milled it out of 3mm Aluminum.
The slots allow for moderate vertical adjustment. On the bottom, the part has 5 holes for the center screw (just in case) but honestly I only ever used one.
Bending the part was tricky. I underestimated how much force is needed to bend 3mm thick Aluminum over a length of multiple centimeters. I thought that I could simply the part in a vise and bend it with large pliers and maybe a piece of wood along the edge. That turned out unfeasible, since I could hardly put enough pressure on it and the bend radius became much too big. Finally I did the trick by fixating the not-to-be-bent areas with thick steel profiles and using a 1 meter long piece of wood as a lever.
That first version was already usable, but it had somewhat sharp edges. I chose to paint it with black liquid rubber, for two reasons:
- The rubber covers the sharp edges and prevents them from scratching or damaging stuff
- The rubber makes the part very sticky, so it never slides away where other parts are attached to it.
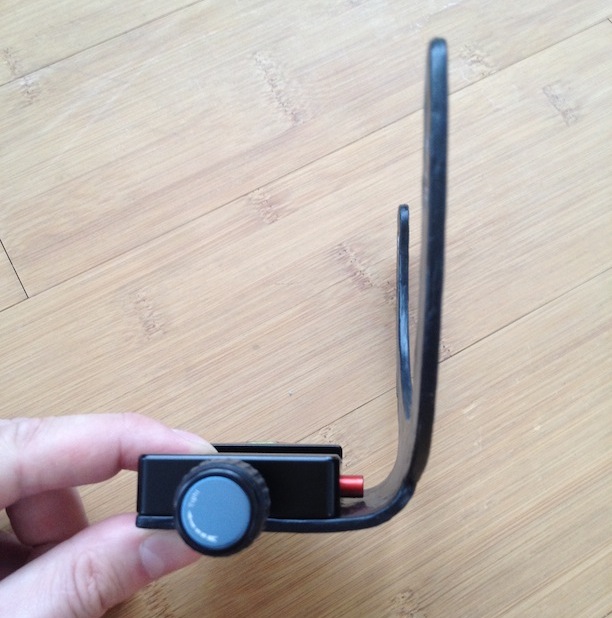
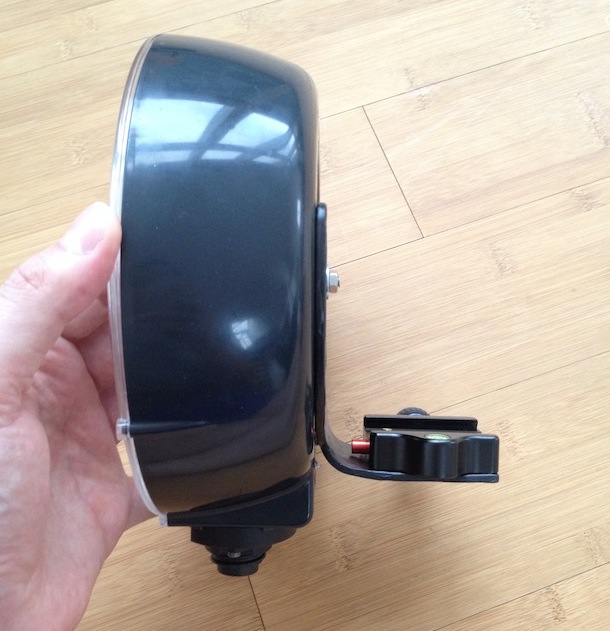
Meet the Arca mount
Ringflash makers want you to screw the bracket to the bottom of your camera with a tripod screw. Is this how you mount your camera on a tripod? If not, why should you mount a ringflash this way? A quick release mount is much more convenient, and I have a quick release plate under my camera anyways, hence I bought an Arca-swiss compatible mount made by Sirui and screwed it to the bracket for good.
Conclusion
I am very content with this part. It can be adjusted in two dimensions. Very easily in one, and a (less conveniently) in the other. The adjustment ranges are within useful limits. Much less flexible than with the conventional mount, but hey: I adjusted it once and never ever needed to change it again.
The rubber coating is practical although not pretty. It doesn't look as nice as an industrially manufactured part, but who cares.
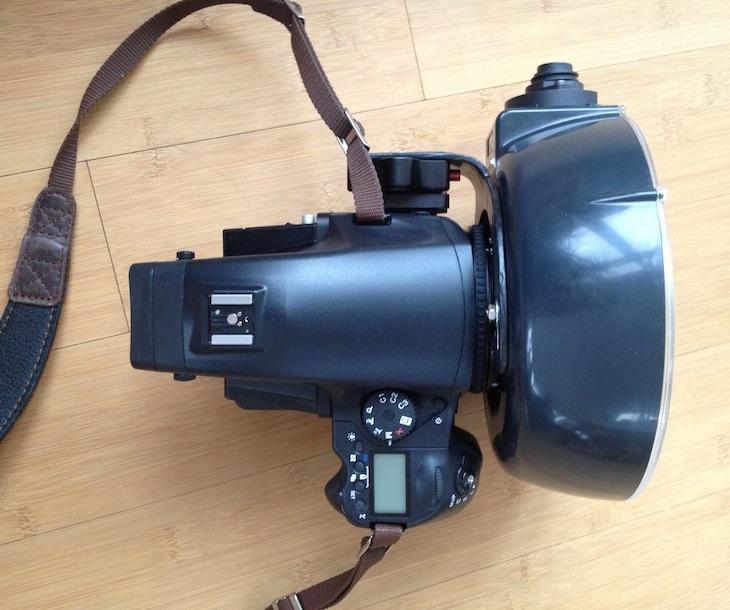
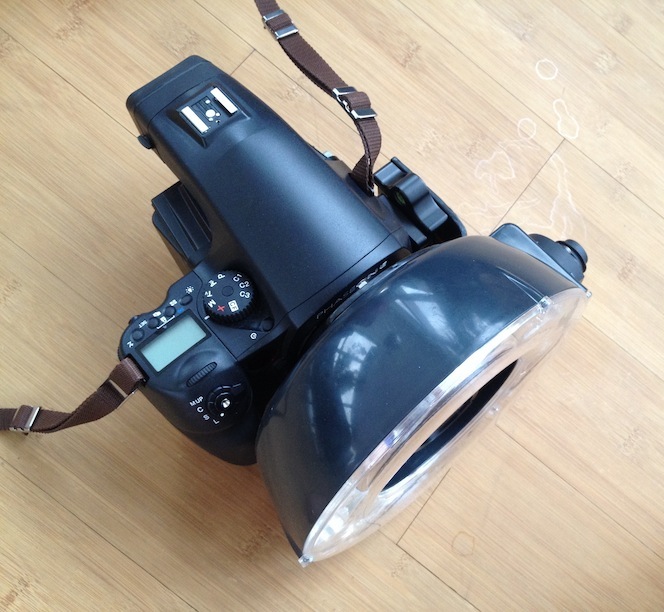
As you can see on two pictures below, I mounted it to the side of my camera. It can also be mounted to the bottom of the camera, but I always have an Arca L-bracket on my camera anyways, and mounted this way, the screws (of the ringflash) don't get in the way of my fingers when holding the camera. Furthermore, the camera rests better on a flat surface when it's mounted to the side.
In a potential version 2.0, I could even place the slots diagonally to get the screws in more convenient places.
Someone asked: How do you zoom your lenses when that thing is so close to the camera that you cannot reach the zoom ring? I don't. I only use my ringflash on my PhaseOne camera, and ALL my lenses for this camera are fixed focal length. There is no zoom.
See below for more pictures. By the way: I have one more bare aluminium part since I made two. It's slightly blemished but perfectly usable, and available for an affordable price to anyone interested. Or you can have the CAD file for free.