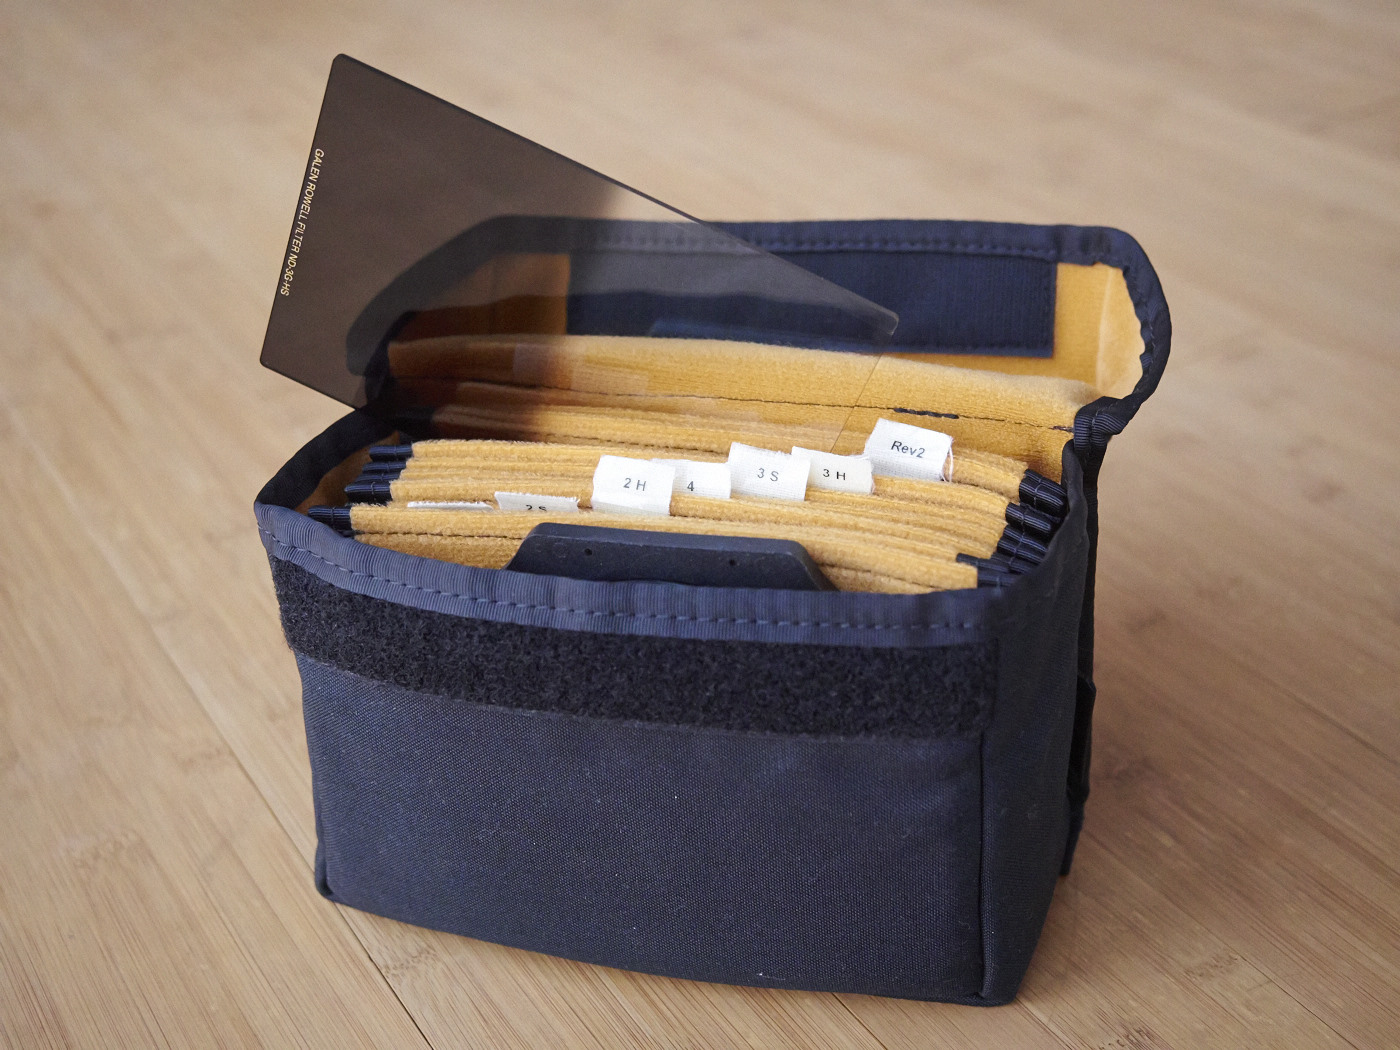
Seven5 Filter Case

A custom Sev5n filter box for 75x90mm filters.
I made my own because nobody makes those commercially. It's compact, light and sturdy. Here's how to do it.
What makes a good filter case?
Slide-in filters are probably the most useful accessory for landscape photography (besides a good tripod). With those fragile rectangular pieces of resin or glass comes the need to store them. A good filter storage system should
- prevent filters from collecting dust and dirt
- protect filters from scratches (especially resin filters)
- protect filters from breaking (especially glass filters)
- allow you to quickly and easily access a particular filter and to store it again after use, preferably with one hand, so you can concentrate on taking photos
- be light-weight and small in your camera bag
Some people use those CD-wallet-like pouches that open like books and are intended for round screw-in filters. I'm not a fan of those, since it's too cumbersome to find the filter you need. Other pouches unfold like a long scroll. That's not feasible in windy conditions or when you have no place to put it on wet or dirty ground. The best case I found for my large (6x4" / 100mm / "Z-Pro") filters that I use with my Canon 5Dii is the Kinesis F169 Filter pouch... but that's one-size-fits-all and much too big for Seven5.
What about Seven5?
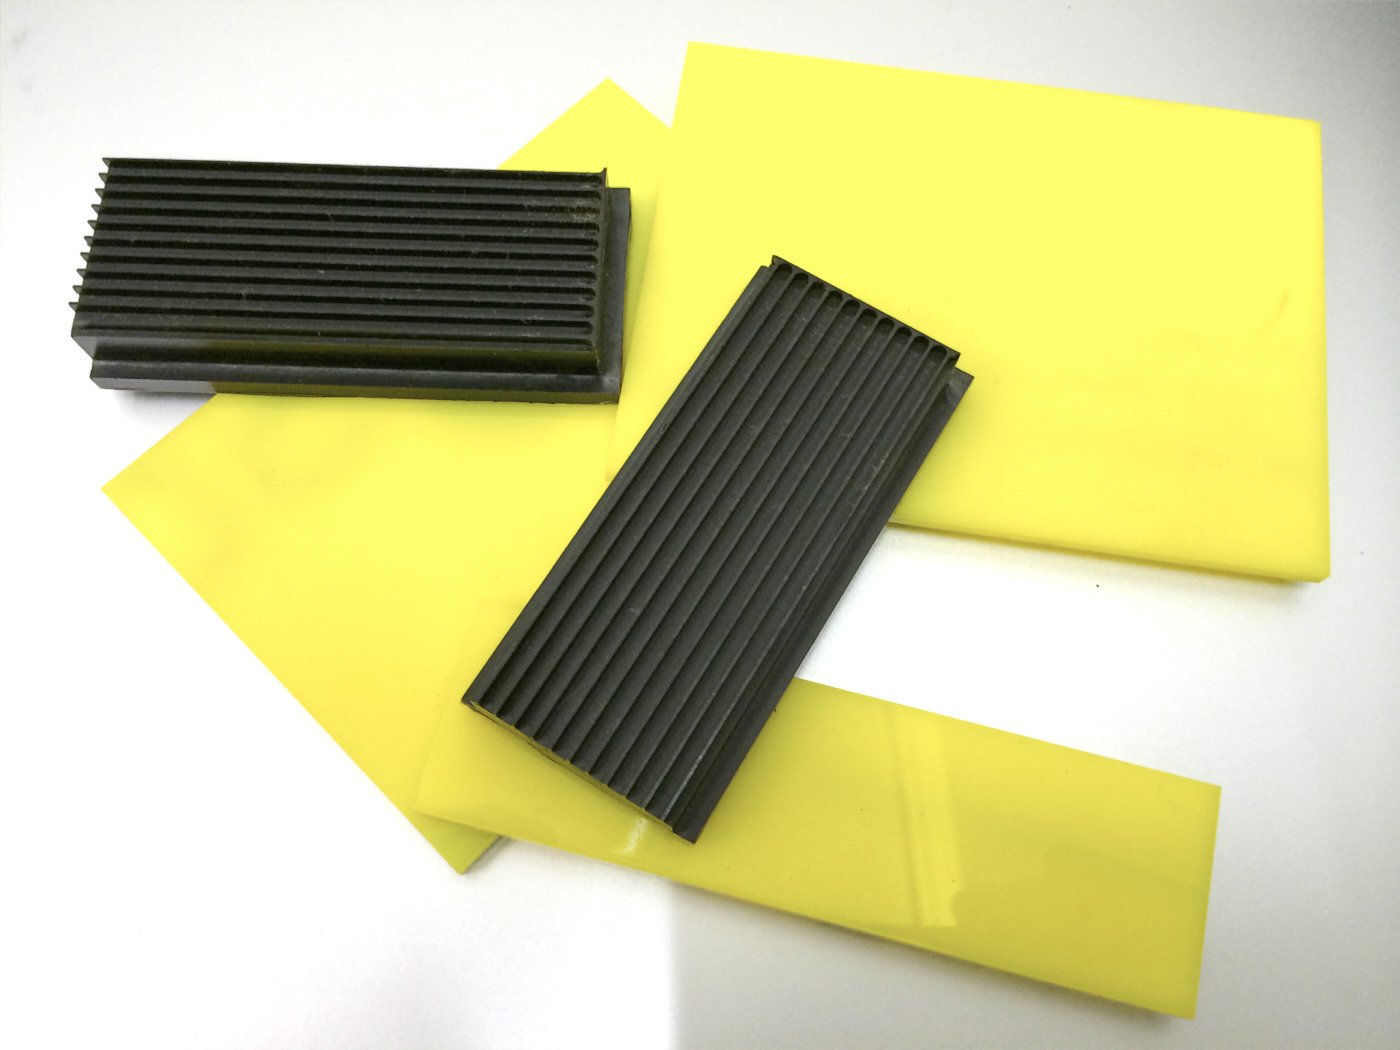
When I got my mirrorless camera (the Olympus OM-D E-M1), I noticed that my existing filters are less than ideal for the small MicroFourThirds lenses. Sure they're usable, but the gradients are too soft and the filters take too much space in a stream-lined small bag. What I needed are the smaller 75x90mm (3x3.5") filters. Lee calls them Sev5n but Singh-Ray and some other manufacturers make them too.
I found that there is not a single filter pouch or box available on the market for filters of this size. Really, none! So I made one. Here's how.
Soft pouch or hard case?
First I had to decide whether I wanted a soft bag or a hard case. I thought about sewing a soft pouch (like the Kinesis) from micro-fiber lens-cleaning cloth with thin layers of PVC between it (simply cut PVC folders to the desired size) to keep the shape. Then however I decided to go for a hard case. My reasoning was that when nothing touches the filters' surface, they run the lowest risk of being damaged.
3D printing was not accurate enough
My first attempt was 3D printing. Using a 3D CAD program, I designed the parts for the sides which have a little grid of spacers that hold the filters apart. I could have printed the whole case as one single part, however that would have taken forever and used up too much filament, so I decided to only print the complicated side parts and add simple rectangular acrylic parts as covers from three sides.
I decided to print the parts standing (as opposed to lying) because I wanted the guides to consist of many layers and not just one layer of filament that can easily break off. When starting to print, I was concerned about two things:
- The overlapping bit that later holds the ground cover needs to be printed "in the air" - is that feasible?
- If I print the part standing, is it at risk of falling over?
It turned out that both were not a problem. The slicer I used (MakerBot MakerWare) did a good job of generating easily removable support material for the overlapping part, and thanks to a raft on the build plate, the part stood very stable.
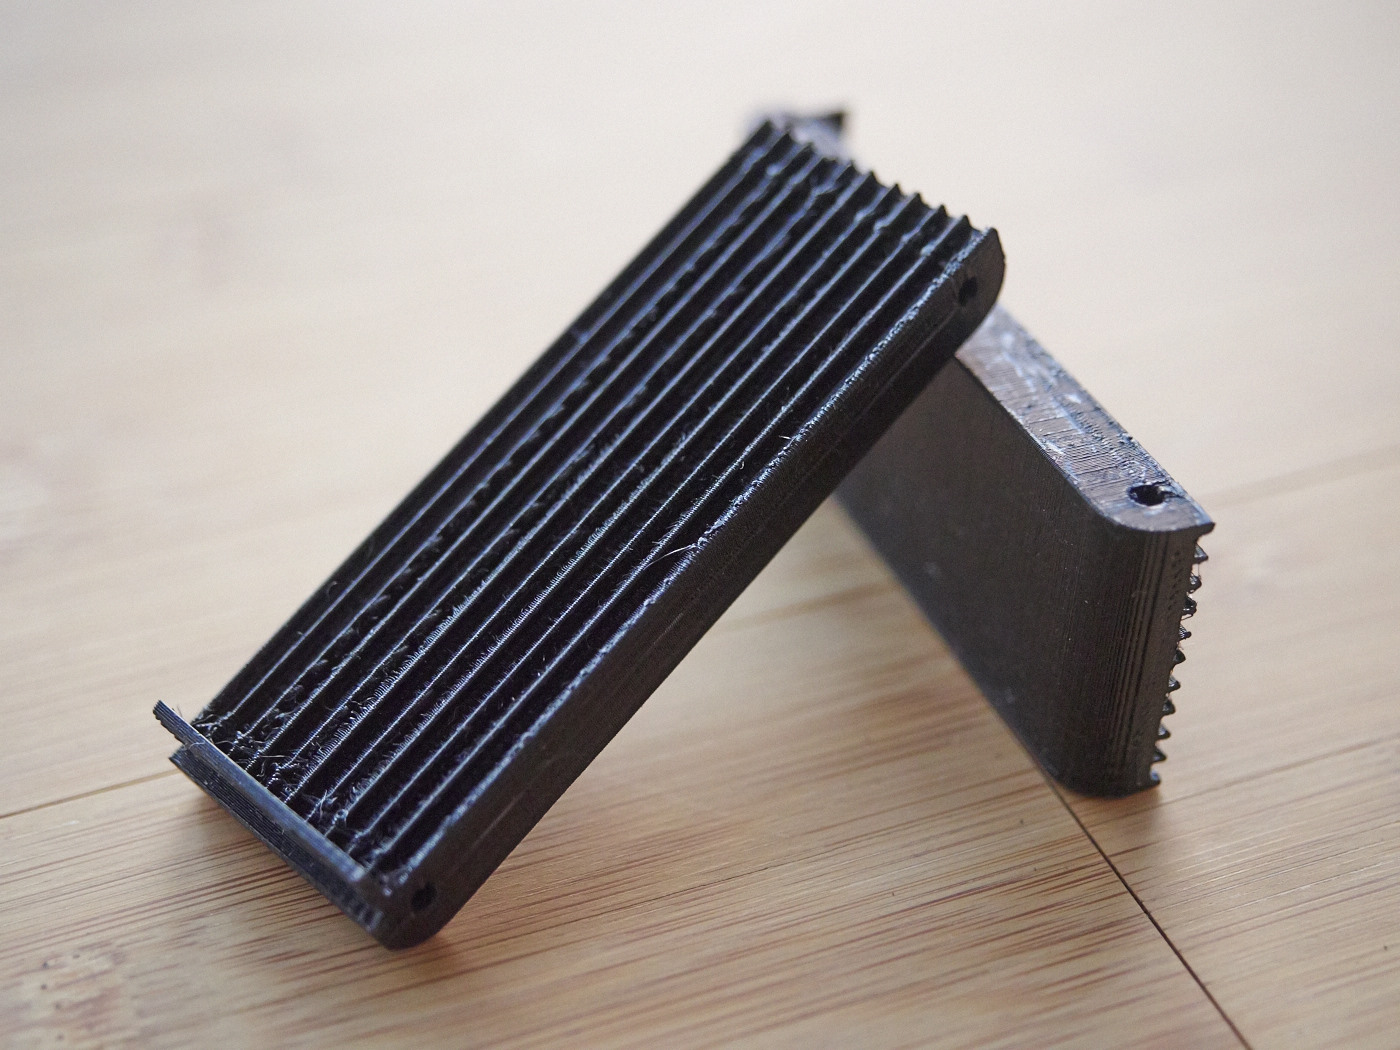
The problem however turned out to be a different one: the printer's accuracy. I had designed the guides between the filters to be 0.4mm thick (which is one layer of filament on the MakerBot Replicator 2. The printer however oozed extruded filament all over the place, causing some filter slots to be almost half a millimeter thinner than designed. I cleaned it up a bit, but it's still visible on the photo. That was not accurate enough. After some thinking I came to the conclusion that 3D printing is not the prefered technology for this project and I moved on to attempt #2:
CNC milling the guides
Designing side parts with guides for CNC milling is not a terribly complicated task. But since the CNC router I have access to is just a 2.5 axis machine, I would have to do without the fancy rounded corners (unless I wanted to spend a lot of extra time on turning the part around, re-aligning and fixing it again). So here's version 2 (I didn't even draw it in 3D, I went straight from the 2D drawing to the CAM tool, Cut2D):

As a material for this part I chose 12mm Polyoxymethylene (a.k.a. Polyacetal or POM). I'm usually a fan of aluminum, but in terms of scratching the resin filters, metal would probably not be a good idea. POM is my prefered plastic (I'll soon write an arcticle about it) and turned out to be a good choice for this project as well. Here's a fancy video of the parts being milled by the BZT PFE 1000 PX at FabLab Berlin:
And the milled parts before being removed from the surrounding material (they're only dirty but very accurate):
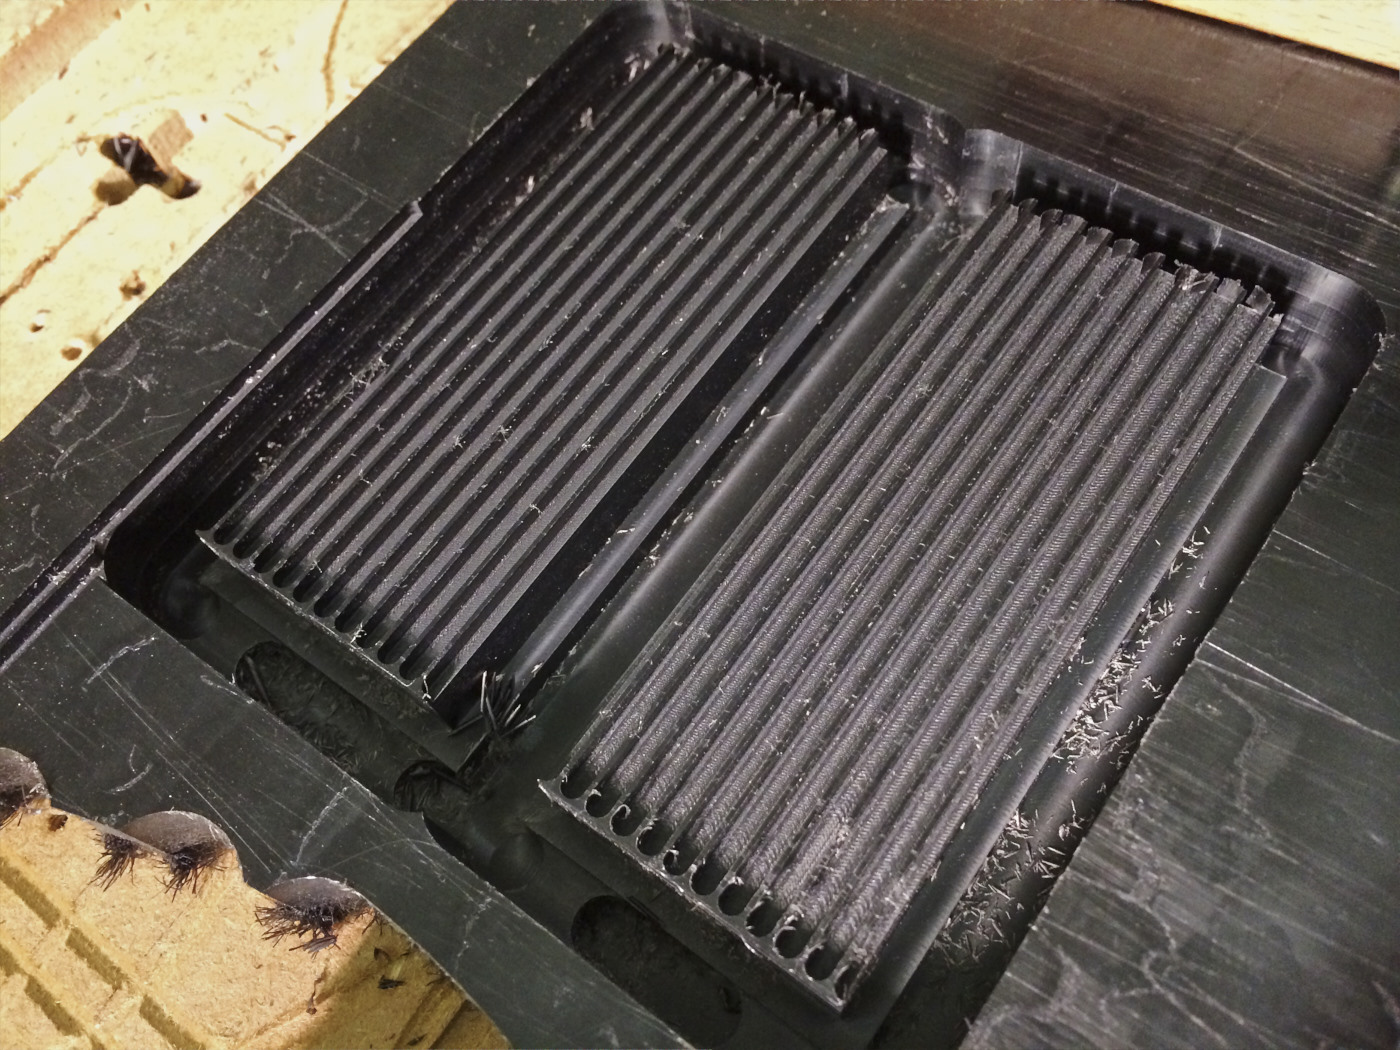
And I made an old mistake again: I didn't cut all the way through. That's because plastics have a huge positive tolerance and my 12mm POM plate was actually 12.7mm thick. A utility knife did a good job in cleaning up the edges.
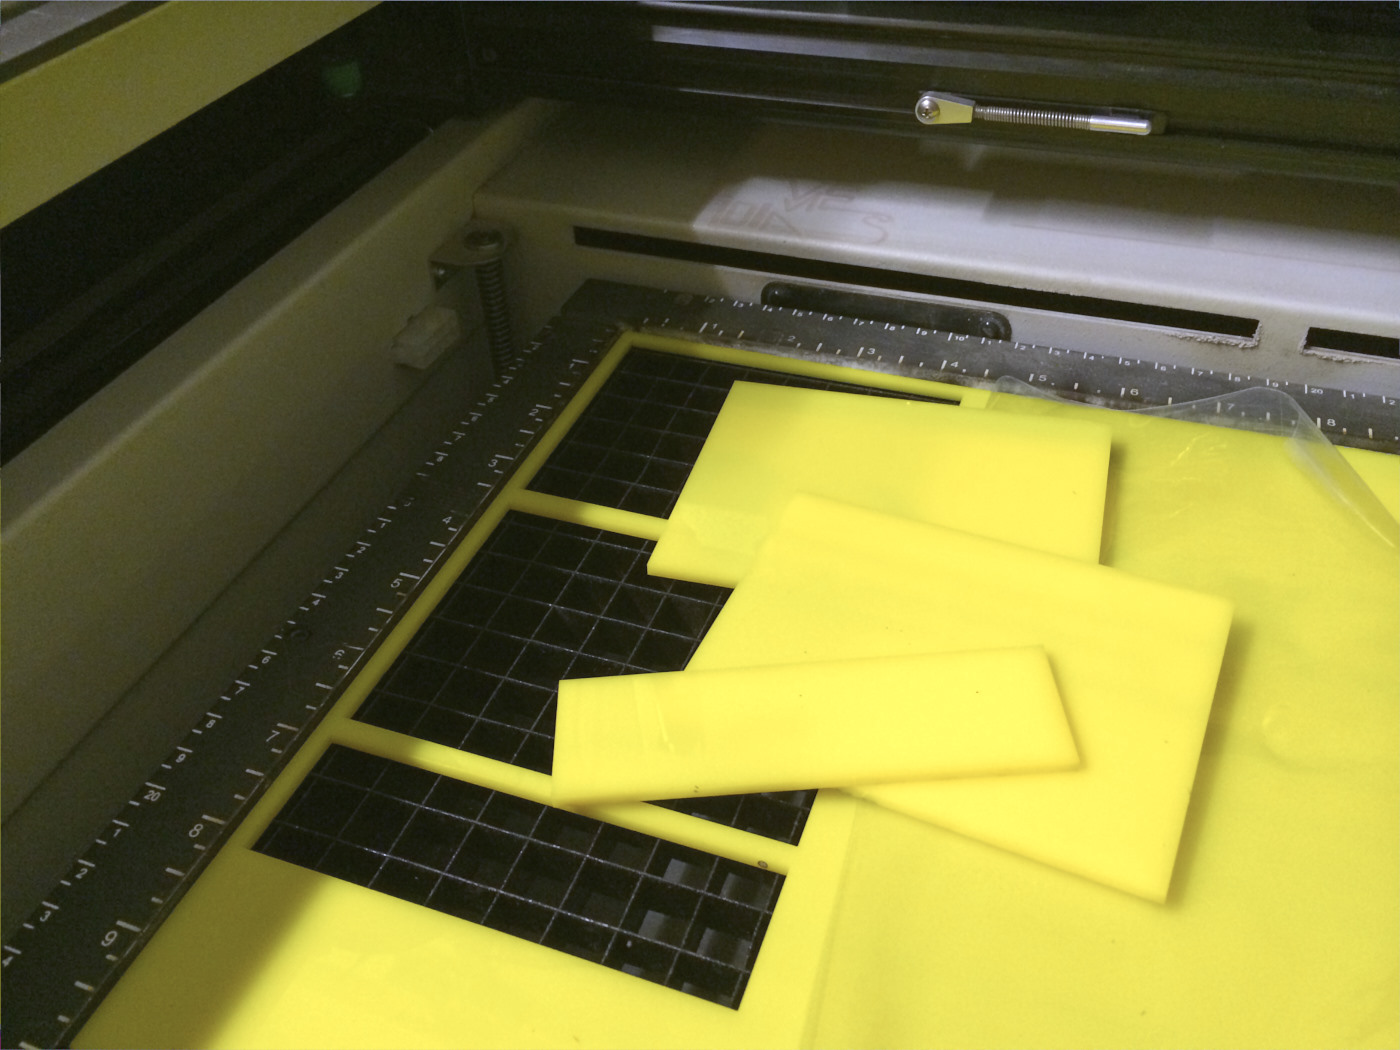
Laser-cutting the covers
I could have milled the covers as well, but since I had always wanted to use a laser cutter, I gave that a try. Ridiculously easy, it turned out, and the cuts were very clean and shiny. Material is 3mm acrylic. The cutter is a Epilog Zing 6030 set at 80% power, 40% speed in VisiCut:
Assembling the case
All parts done, let's put them together.
I hadn't worried about how to put the parts together, but the first intuitive approach was glueing. Now POM is known to be hard to glue since most adhesives don't stick to it. There are special purpose glues which can glue POM, but I didn't have any - I was glueless, so to speak. I decided to just try my trusted Cyanoacrylate and, in case it wouldn't stick, drill some holes and screw the parts together. Cyanoacrylate sticked well though.
As a means of accessing the filters for removal, I had planned to put a little strip into the box under the filters, like a bookmark, that, when pulled, would lift the filters. But I found that simply leaving the bottom side open does just as well, as long as the bottom is somehow protected against dirt.
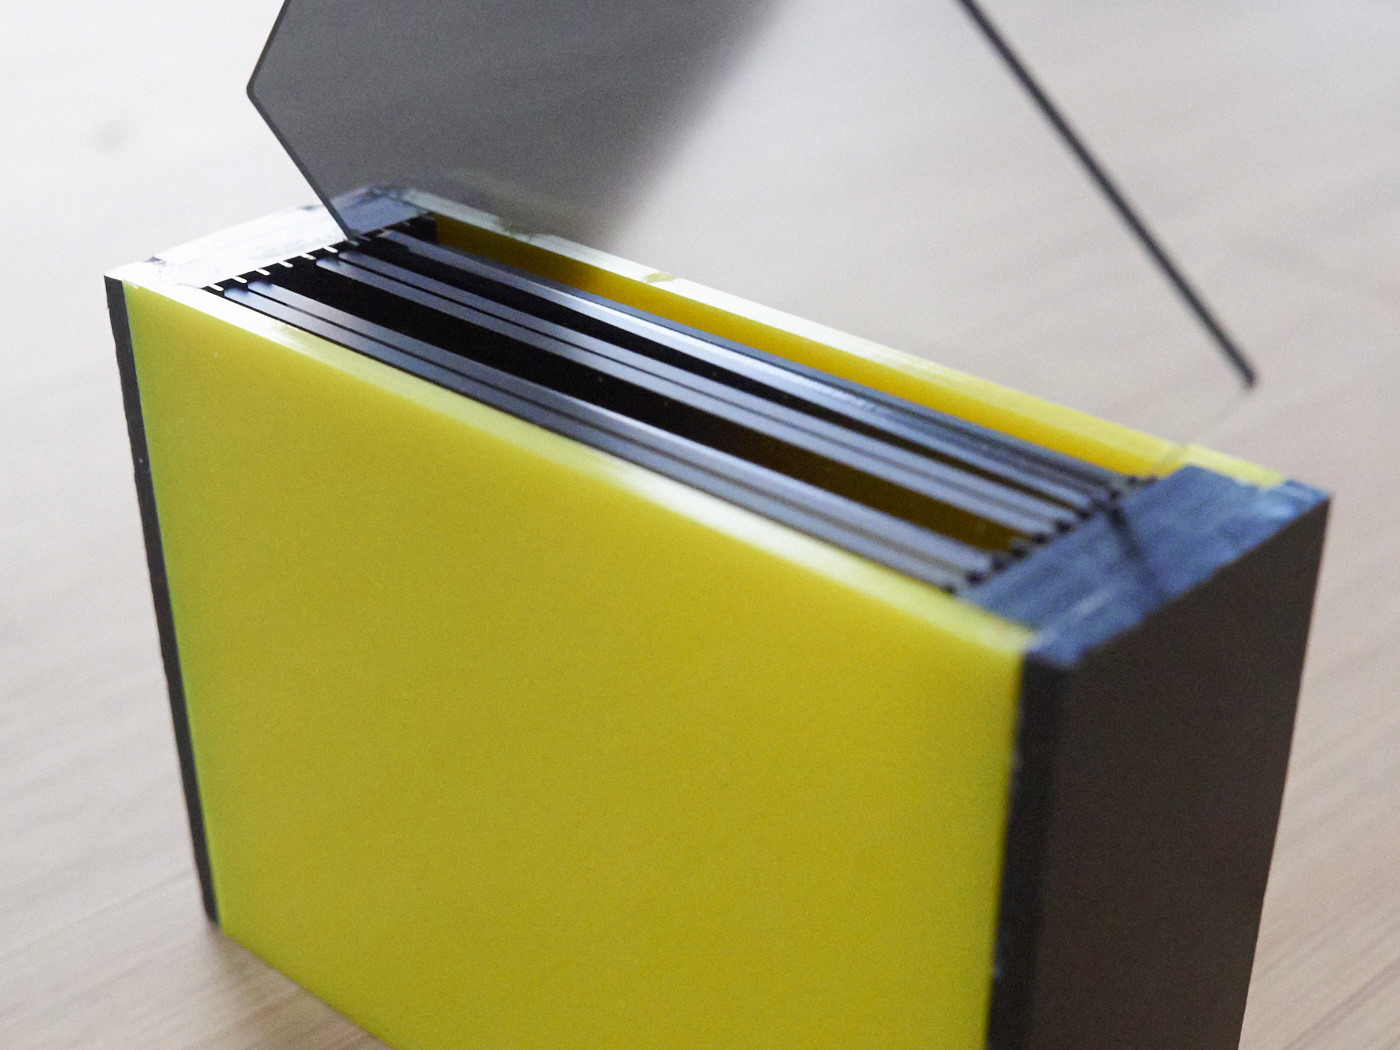
(No, it's not a toaster!)
What's inside
I could glue an index paper to the top of the case, revealing which filter is in each slot. But I don't really need it, since unlike the big Kinesis pouch, this case with its contents looks very characteristic and I can easily remember what these are (bottom to top):
- 2-stop soft grad ND
- 3-stop soft grad ND
- 4-stop soft grad ND
- empty
- 1-stop hard grad ND
- 2-stop hard grad ND
- 3-stop hard grad ND
- 2-stop reverse grad ND
- 3-stop reverse grad ND
- 10-stop solid ND
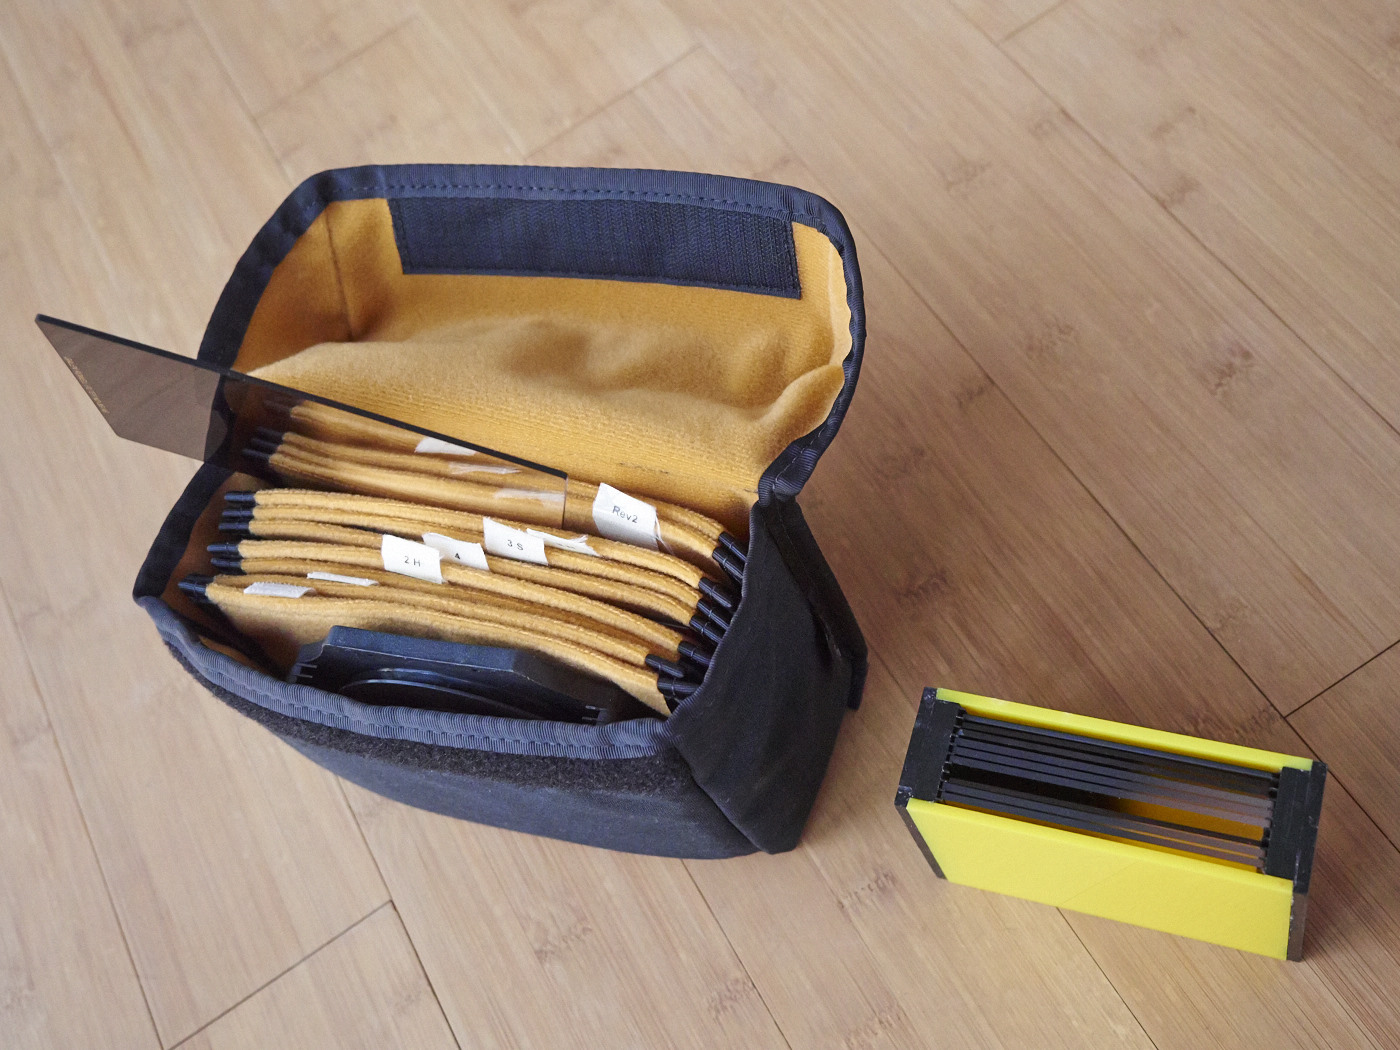
As it turns out, Manfrotto makes a little pouch intended for point and shoot cameras that's perfect for my new filter case, the Seven5 filter holder and the clip-on polarizer:
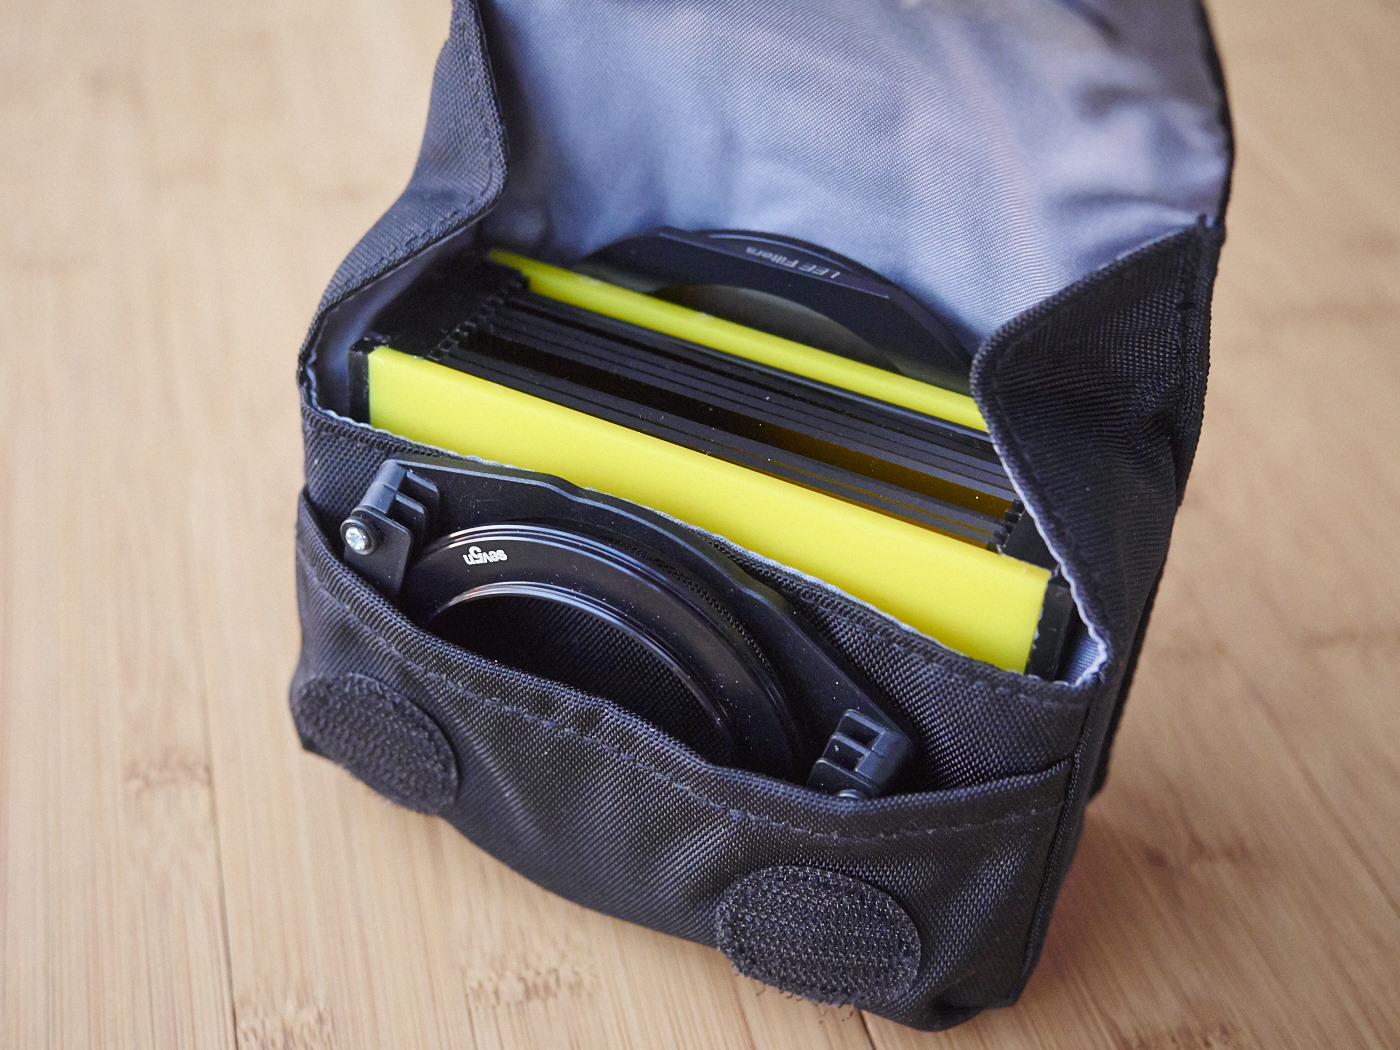
And it's really muuuuuuuch smaller than the Kinesis pouch:
Tell me what you think of this project :)
Why use filters in the digital age?
To take photos like these two I took in Iceland and Yosemite: